1.安装签名工具ldid
2.修改环境变量
3.下载theos
4.新建tweak项目
5.编辑Makefile
6.编写代码
7.编译、打包、安装
安装签名工具ldid
- 安装homebrew
$ /usr/bin/ruby -e "$(curl -fsSL https://raw.githubusercontent.com/Homebrew/install/master/install)"
- 利用brew安装ldid
$ brew install ldid
修改环境变量
- 编辑用户配置文件
$ vim ~/.bash_profile
- 在.bash_profie文件后面添加下面2行
export THEOS=~/theos
export PATH=PATH
- 让.bash_profie配置的环境变量立即生效
$ source ~/.bash_profile
- Xcode识别到手机是会自动把debugserver安装到iPhone上
/Developer/usr/bin/debugserver
下载theos
- 在$THEOS目录下下载代码
$ git clone --recursive https://github.com/theos/theos.git $THEOS
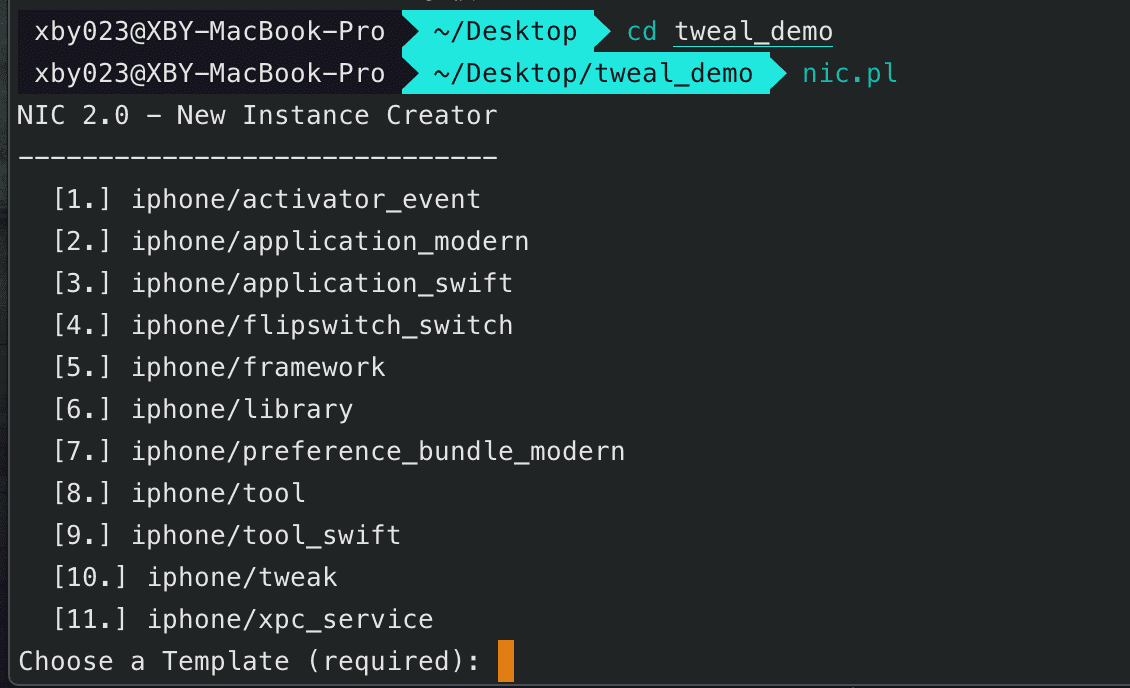
新建tweak项目
- 新建一个目录并执行下面命令
$ cd ~/Desktop
$ nic.pl
-
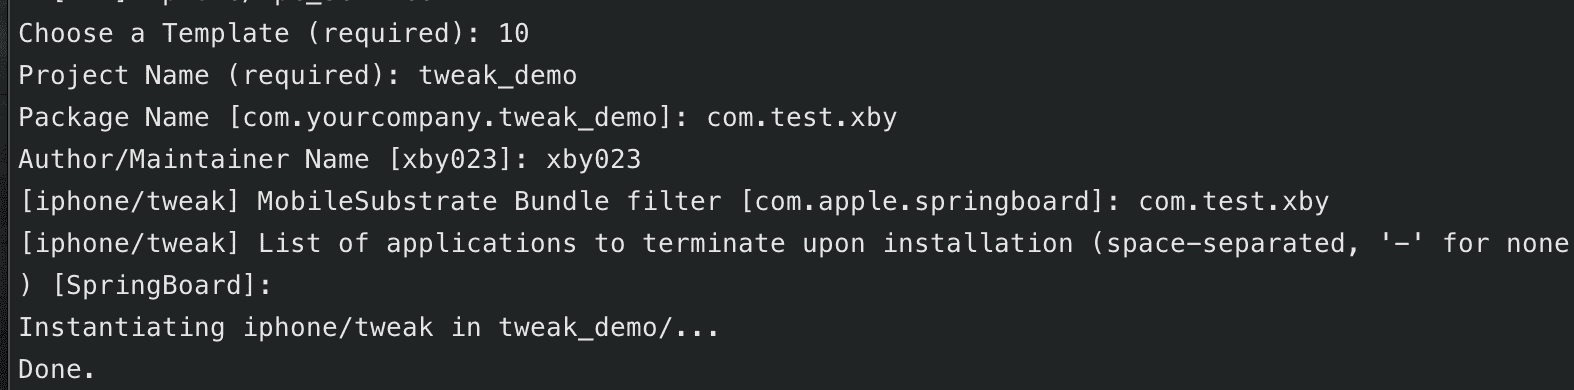
选择 10.iphone/tweak 创建项目
-
根据提示填写类容
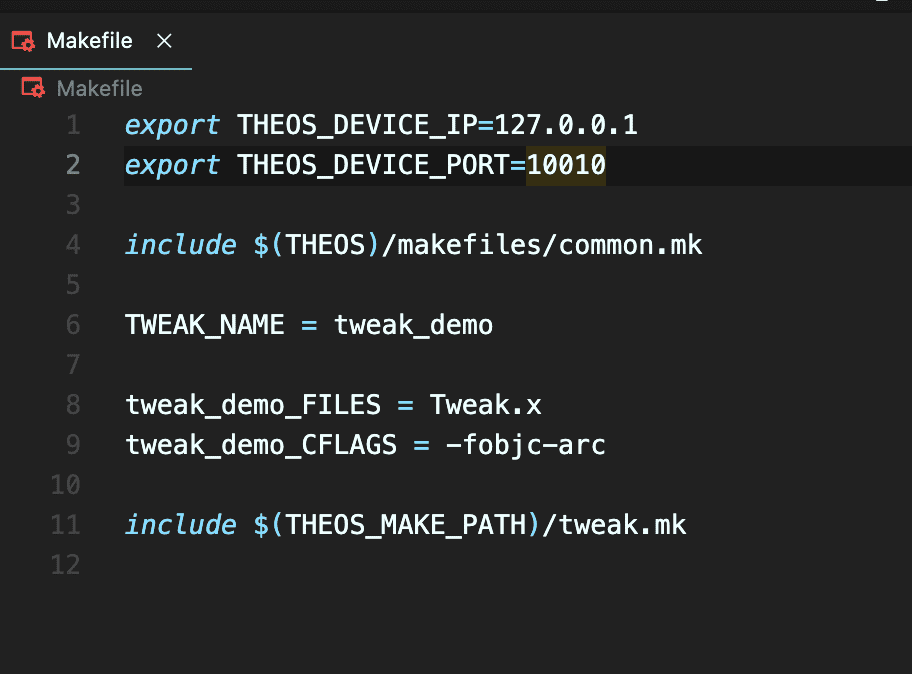
编辑Makefile
- 在前面加入环境变量,写清楚通过那个ip和端口访问手机
THEOS_DEVICE_IP
THEOS_DEVICE_PORT
编写代码
- 打开Tweak.x文件
%hook XMAdAnimationView
- (id)initWithImageUrl:(id)arg1 title:(id)arg2 iconType:(long long)arg3 jumpType:(long long)arg4
{
    return nil;
}
%end

%hook XMSoundPatchPosterView
- (id)initWithFrame:(struct CGRect)arg1 {
    return nil;
}
%end
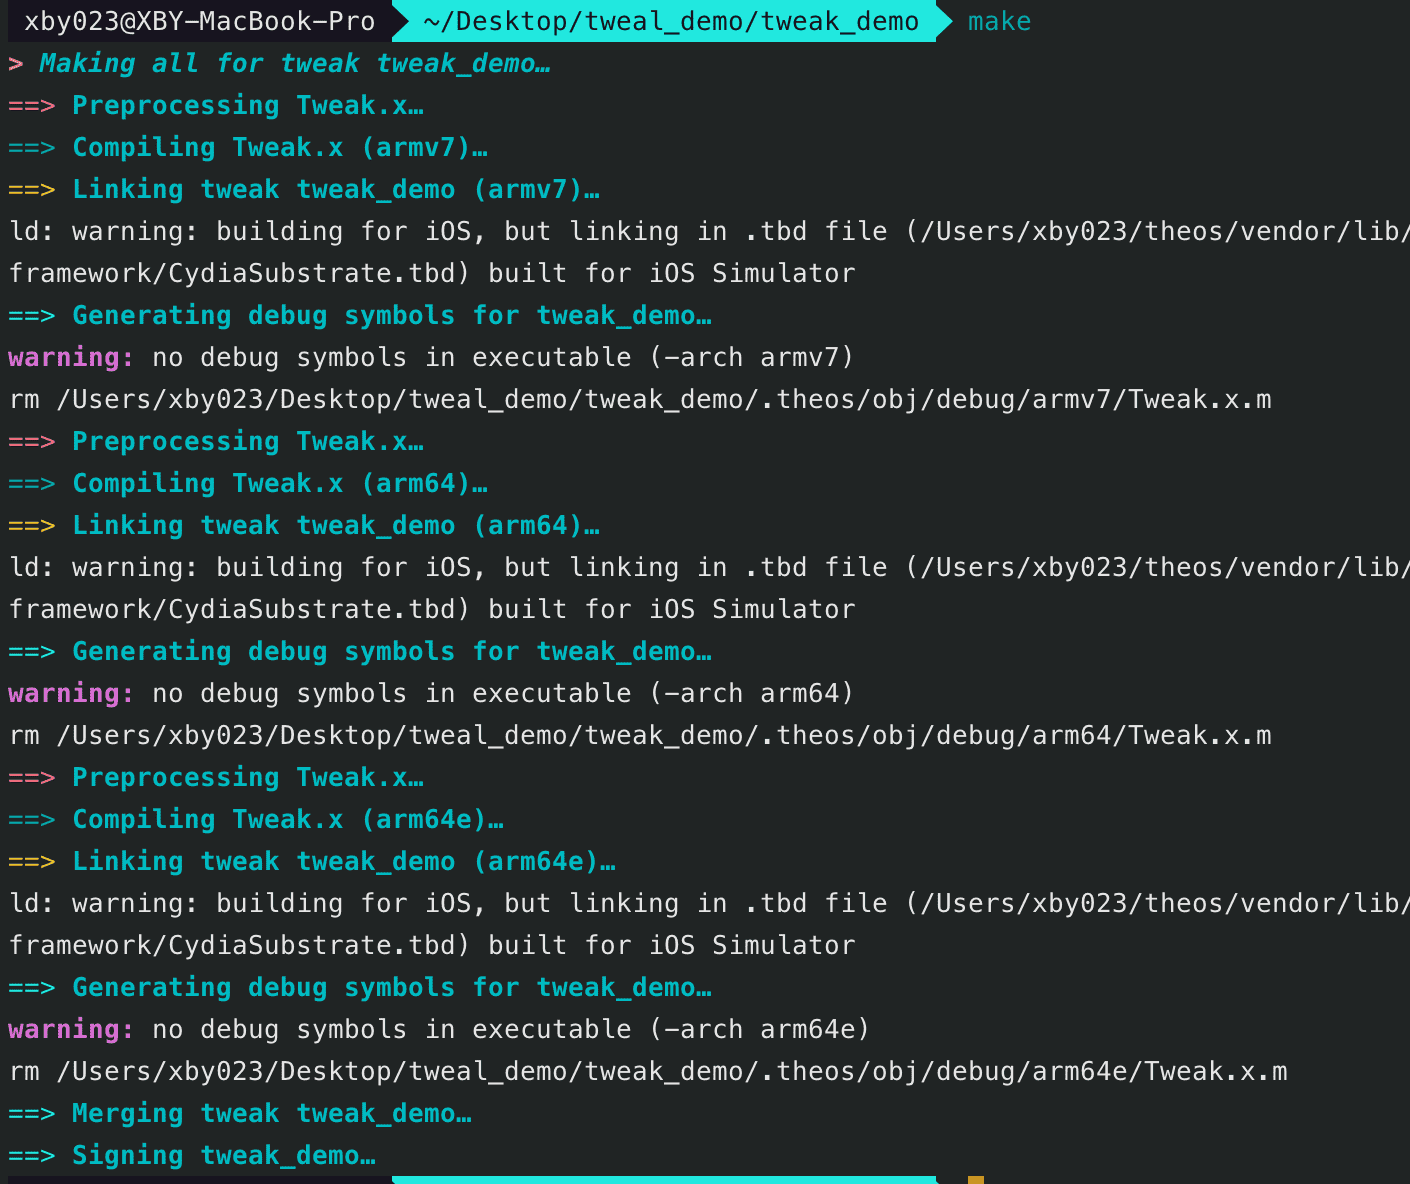
编译-打包-安装
- 编译
$ make
- 打包
$ make package

- 安装
make install
